Latest Additions & Adds


Doctor Tweek is reducing his presence on eBay:

Due to the high fees and studio commitments I have decided to concentrate more effort into the web shop, continuing to provide excellent customer service and value. I will continue to sell a couple of items such as:

  • DPDT Footswitches
  • 3PDT Footswitches
  • Occasional bulk bargains

And in Doctor Tweeks Webshop:

The place in the UK for pedal parts

Parts, Components, Effects and Amps @ Doctor Tweek

Posted in Latest Additions & Adds | Tagged , , , , , , , , , , , , , | Leave a comment

Noise Reduction NE570


If you want to improve the s/n ratio on an effect, particullarly delays, chorus and flangers, trems etc then the way to go is to include a compander into your pedal. A compander (sometimes spelt as compandor by our American cousins) is essentially a mix of two processes that are used to ‘wrap’ around an effect circuit, for example your PT2399 analogue delay.

The compander was commonly used in all the MXR and DOD pedals, in fact probably most analogue pedals from the mid 70’s through the 80’s using the NE570 or NE571 chip from Philips. The NE570 has slightly better specs than the 571 and is more forgiving in its required power suypply. Just off the top of my head without pulling up the data sheet, the NE570 is happy with anything from about 8v through to 18v. Check the datasheet first though…. I take no responsibility for you frying these.

Ah…but the NE570 is out of production… well, yes and no. Doctor Tweeks has a  good stash of these in stock, original Philips items. And there is the SA570 if you can find it.

So the two processes…

The first process is a compressor. In the case of the the un-tweeked NE570 this compression has a very high ratio, and can be likened to limiting. So, this high compression boosts the signal and then makes sure it can not increase much beyond a certain threshold or limit. The input signal to your effect becomes ‘pre-conditioned’ to be nice and loud and with a reduced dynamic range. Think of it ‘crushing’ your guitar (or bass or synth….) signal, packing as much of it as possible into your effect input.

Now normally, this heavy handed compression may give you results you don’t want…. ( or perhaps you do!). However after the signal is passed through your effect it is ‘un-compressed’ ; expanded, which aims to restore the dynamics that where removed with the compression.

Basically, it just makes everything quieter. Nuff said.

Here’s an untested layout, I’m sure it could be done better and smaller than this… the schematic with values will be posted soon when I can lay my hands on it. Meanwhile….


Posted in diystompboxes, guitar effects | Leave a comment

Using Stripboard for your Electronic Project Builds


 Small and perfectly formed

There are a lot of ready built PCB’s available for making guitar FX. If you’ve done your web browsing you have no doubt found several sources for these, including the occasion offering from Doctor Tweek… or perhaps you could invest in all the kit and chemicals and make your own….

However, for the true ‘one off’ or a limited run of boutique creations, strip board, also known by the trade name of VeroBoard, is a great way to go. Not only is it useful for building working pedals, but it is also great for prototyping a design before committing it to a home made or commercial PCB. With stripboard you get to move your design from the test bed of a breadboard (which is great in itself) to an enclosure, so you can really check out the quality and noise issues – and of course play and gig with it!

A lot of folks are put off using stripboard because it seems complicated. What you have on a well designed stripboard often looks nothing like the schematic…but really it is simple if you go about it the right way.

Some experienced builders go straight from a schematic onto stripboard. It’s quite possible. However, I personally use a nifty piece of software called ‘LochMaster’… a free trial version is available. It allows you to place your components on a virtual board, move things around and optimise the layout. Also a lot of people just use a piece of graph paper or a printed stripboard template, along with a pencil and eraser. Nope, not for me – I’ll stick to the software!
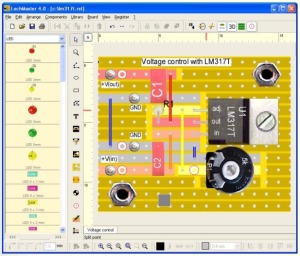
Doctor Tweek recommends Lochmaster Vero Design Software

Super program for not much money.

The objective for most curcuit builders is:

  • Make the circuit as small and compact as possible.
  • Keep the layout neat and tidy to minimise noise.
  • Create a logical layout that is easy to modify.
  • Perhaps make the build modular so that different component boards can be used. (a modular approach also means that complex schematics can be broken down into easier to handle chunks).
  • For the boutique builder, the idea may be to be able to replicate the build easily for a small, ‘limited run’.

Here are some tips to making your own Veroboard layout:

In software, use a large oversize piece of stripboard so you do not run out of ‘space’. You can always trim the virtual board down later as you hone and tidy up the layout.

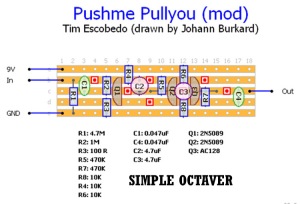
I always start by having my supply rail on the top strip and my earth as the bottom strip. You can see an example of this on the pushme pullyou octaver at the top of the page.

Start at the left of the schematic… look at the first component and place this on the vero (in software) then follow the circuit to your next component. On the vero make sure your component is going accross tracks – not along them (otherwise you will have to make a cut in the track to avoid shorting out the component!). Now follow the schematic to the next component and place… The idea here is to avoid using track cuts as much as possible – too many can get to be a real headache when you put the vero into practice. However it is doubtful that you can get away without making any cuts.

Another way to approach the task, and probably more suitable if your working with IC or Op-Amps, is to work from the center outwards. Place your chip in the middle of the stripboard and work your way around the pins, placing components as required. A note….don’t forget to cut the strips underneath the chip, other wise you will end up connecting all the pins on one side of the chip to the other side….not pretty!

The software allows you to look at the front (plain side) and the back (copper stripped side), just as you can do with the real board. It is important to get a feel for flipping the board over and relating where the componets go – as they will be ‘mirrored’ when you do this. When actually populating your vero board with components you will have to get used to this flipping over action and confirmation of where leads are in relation to the strips and cuts in the tracks.

Just to point out that the components are placed on the plain side…. generally.

If this all seems mighty confusing… well there are plenty of layouts out there already. But I reckon the satisfaction of making your own is worth the trouble.


Posted in diystompboxes, guitar effects, recording, guitar, effects, boutique, stompbox, diystomboxes, electronics, studio, lincoln, lincoln uni, guitar pedal, | Tagged , , , , , , , , , | 2 Comments

Custom Builds from Vachon Audio


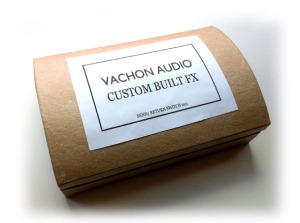
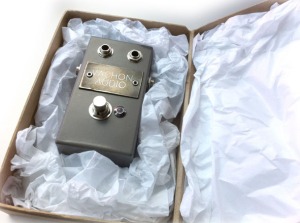
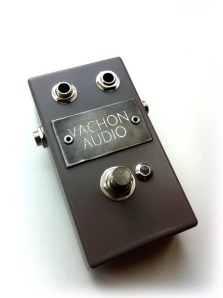
Dave from Vachon Audio sent me some very nice pictures highlighting his custom built switcher boxes. The example below is an effects send and return pedal, allowing you to true bypass a non true bypass pedal, amongst many other uses. More details can be found by clicking on the Vachon Audio Link at Doctor Tweek Pedal Parts.

Vachon Audio Pedal in presentation case

Vachon Audio Custom Pedals come in a superb presentation case. Looking inside it all looks superb...

Nice!

The switcher looks very well made...

Ready to Gig

Very industrial and solidly built, ready for gigging

Posted in boutique effects, diystompboxes, guitar effects | Tagged , , , , , , , , | Leave a comment

Arbiter Fuzz Face – Germanium Re-Issue


A few people have asked about this… no great shakes, but there are a few different values used in this re-issue of the classic Arbiter Fuzz Face. I found a sketch out there and have drawn it up clean and mean:

Nice clean drawing of the germanium fuzz face re-issue by Doctor Tweek
Some slight changes over the original… nice.

This is the pedal that was built into the smiley face enclosure. Can’t say I like that big round tin. The size of this circuit could probably be buit into a match box…or your guitar…mmm – there’s an idea!

Don’t forget, you can get your nice AC128’s at Doctor Tweeks UK shop, as well as all the other bits and pieces you need such as footswitches and enclosures.
Google gave:
Arbiter Fuzz Faze reissue
Type of pedal: Fuzz/distortion
Features: Classic appearance, teardrop markers on casing and controls, numbered knobs, screwed-on rubber feet, high-quality circuitboard, wiring, potentiometers, jacks, and footswitch,
Price: $185.
Build one yourself - diy fuzzface

You can build this for very little

Posted in boutique effects, diystompboxes, guitar effects | Tagged , , , , , , , , , , | Leave a comment

Get Switched On


You may need a switcher pedal for an amp or indeed any type of switcher for your pedal board, fx, keys, synths or whatever. Sometimes something is available off the shelf, sometimes not. Whatever, you can have your switch solution custom built to your specs.

Michael from Sleeping Dog FX can have a look at your needs, discuss it with you and make what you need. He uses Doctor Tweek components, so you know you are going to get a quality build both in terms of attention to detail and in the way of reliable hardware.

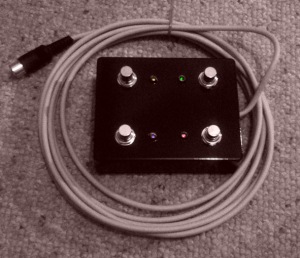
Custom Built Marshall Footswitch made by Sleping Dog FX @ Doctor Tweek

Custom Built Marshall Footswitch for the 9001 Pre-Amp

Recently Michael made up a now discontinued swithcher for a Marshall 9001 Pre-Amp. He tells me that this is available custom built in the states for £110. Crazy! He custom built the item for £85 which included special LED lighting as well as an extra long connection cable. So, anything is possible  – if you need a switcher or any type of routing unit please contact Doctor Tweek, or visit Sleeping Dog FX through the builders links page.

Posted in boutique effects, diystompboxes, guitar effects, recording, guitar, effects, boutique, stompbox, diystomboxes, electronics, studio, lincoln, lincoln uni, guitar pedal, | Tagged , , , , , , , , , , , , , , | Leave a comment

Silicon Fuzz Face PCB


Sleeping Dog FX have made up a really nice PCB for the Silicon Fuzz-Face (germanium coming soon!). To go with this Doctor Tweek is supplying a Silicon Fuzz-Face Parts Kit. It includes everything you need to build onto the PCB ad get it working in the box. Brilliant. The only thing you need to decide and add are which knobs you fancy – and there are plenty of choices at Doctor Tweek!

Full instructions are included in the kit:

  • Schematic (to help you tweek and modify should you wish)
  • Component Placement Diagram (explicit stuff!)
  • Top Tips Help Sheet (for the newbie to building)
  • Component List (so you can check stuff off)

Doctor Tweek's Silicon Fuzz Face PCB by Sleeping Dog FX

The board is available separately should you have your own components to use (dirty, filthy traitor!) – or you can even buy the component kit without the board so that you can vero or perf-board the build. Now that’s flexibility for you!  So have a look at http://www.doctortweek.co.uk   – obviously, any questions just ask at info@doctortweek.co.uk                                                                                                   Oh, Needless to say… it sounds bloody awesome, of course.                   

Posted in boutique effects, diystompboxes, guitar effects | Tagged , , , , , , , , , , , | Leave a comment

Alternate Tunings


Alternate tunings are a brilliant way to breathe new life into your sound. Some are well known – some less so. I can’t take any credit for this wonderful list – originally found at http://www.howtotuneaguitar.org/tuning/alternate-guitar-tuning-chart/

But it’s worth a copy here if it gets it out to more people 🙂

Note that some of the more radical tunings will alter the intonation of your instrument… enough to live with probably if you are only tuning for a while; but if this is going to be a permanent tuning it is probably best to check your intonation. I have one guitar tuned down a whole step and another in DADGAD… these guitars are now set up to be perfect at these tunings (the ‘drop one step’ is a Floyd Rose and took ages to get right!). Be aware also that if you are using a short scale such as a Les Paul or Jaguar then droping lower than a standard tuning may well make the whole thing too floppy…but hey, floppy strings can be fun 🙂

Alternate Guitar Tuning Chart

Standard Guitar Tuning E A D G B E
Admiral C G D G B C
All Fourths E A D G C F
Aug Fourths C F# C F# C F#
Balalaika E E A D E E A
Baritone B E A D F# B
Buzzard C F C G A# F
C A D G B E C A D G B E
C 6 C G C G A E
Charango X G C E A E
Cittern (1) C F C G C D
Cittern (2) C G C G C G
Collins F C F Ab C F
Cooder Db Ab Db F Ab Db
D A E A E E D A E A E E
D Minor D A D F A D
D Modal D A D D A D
DADGAD D A D G A D
Dobro G B D G B D
Dropped A A E A D G C
Drop D D A D G B E
Double Drop D D A D G B D
Face C G D G A D
Four & Twenty D A D D A D
Fourths E A D G C F
G 6 D G D G B E
G Minor D G D G Bb D
Iris B D D D D D
Half Bent F Bb Eb Ab C F
Hendrix Eb Ab Db Gb Bb Eb
High Plain D E A d G B E
Hot Type A B E F# A D
Kaki King C G D G A D
Kottke C# F# B E G# C#
Layover D A C G C E
Leadbelly B E A D F# B
Lefty E B G D A E
Lute E A D F# B E
Magic Farmer C F C G A E
Major Sixth C A F# D# C A
Major Third C E G# C E G#
Mandoguitar C G D A E B
Mayfield F# A# C# F# A# F#
Minor Sixth C G# E C G# E
Minor Third C D# F# A C# D#
Modal D D A D G A D
Modal G D G D G C D
Nashville e a d G B E
Open A E A C# E A E
Open A E A E A C# E
Open C C G C G C E
Open C C G C G C E
Open D D A D F# A
Open D D A D F# A D
Open D Minor D A D F A D
Open E E B E G# B E
Open G D G D G B D
Open G D G D G B D
Open G Minor D G D G A# d
Overtone C E G A# C D
Pelican D A D E A D
Pentatonic A C D E G A
Processional D G D F A A#
Slow Motion D G D F C D
Spirit C# A C# G# A E
Standard E A D G B E
Tarboulton C A# C F A# F
Toulouse E C D F A D
Triqueen D G D F# A B
Posted in recording, guitar, effects, boutique, stompbox, diystomboxes, electronics, studio, lincoln, lincoln uni, guitar pedal,, studio recording | Tagged , , , , | Leave a comment

Making Up Guitar Cables & Patch Leads


Michael from Sleeping Dog FX recently decided he needed some flashy new guitar cables and patch leads. With a gig up and coming there was no time to lose… rather than paying through the nose for inferior cables, Michael popped an order in with me for a batch of REAN (Neutrik) plugs and some rather excellent Evolution OFC Professional Instrument Cable.

Michael was good enough to photograph the process – yes it’s simple, but like all good things there is the right way to do it. The attention is in the detail, and if you want roadworthy cables that will stand the test of time then you have to do it right.

Pictures by Michael from Sleeping Dog FX, words and instructions from Doctor Tweek…

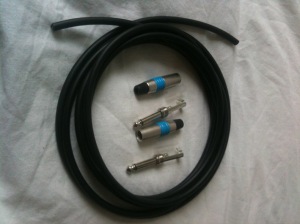
Step One. Get QUALITY Components…

Good Quality Cable & Plugs from Doctor Tweek

Step One: 6 meters of OFC anti-kink guitar cable and REAN Jacks

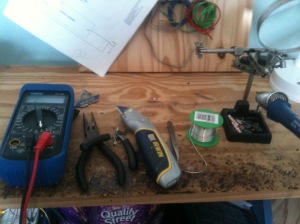
Michael's Bench - Sleeping Dog FX are made here!

Step Two: A collection of tools on the bench - nothing more frustrating than not having the right tools for the job.

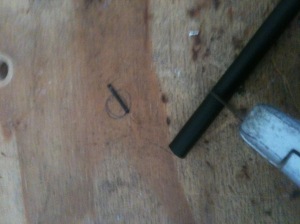
The frst cut is the deepest...

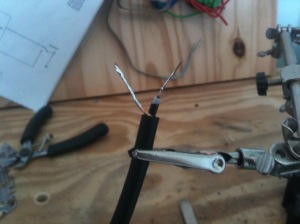
Step Three: Starting to prepare for the first plug - Michael scores around the outer sheath of the cable, about 25mm from the end. Careful not to cut too deeply - just roll the blade over the insulting sheath all the way around the cable.

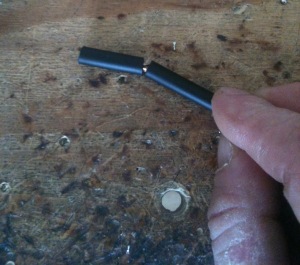
Once cut all the way round, pull off the insulation...

Step Four: Once the cable has been cut as in the previous image you can pull off the outer insulation.

Pull of the outer insulation...

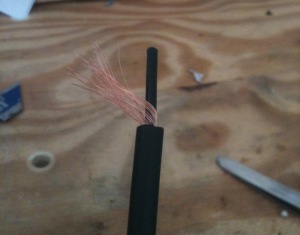
Step Five: Heres the braid revealed after pulling off the outer insulation. Now, you didn't cut too deep and cut through this did you?

Cutting the intermediate insulation

Step Six: Here Michael is cutting the intermediate insulation. Note that he has moved the blade about 5mm further towards the end of the cable, also note that the blade is at an angle so that he has more control of the depth of cut. Again you don't want to cut all the way through...just this layer of insulation.

Twist the braid and remove the intermediate insulation...

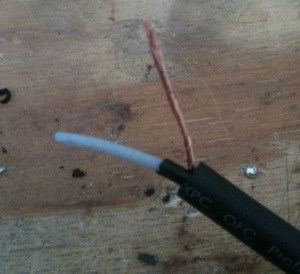
Step Seven: The intermediate insulation can now be removed, revealing the inner insulation. Also the braid is now twisted between your finger and thumb.

Remove the inner insulation and twist the inner wires...

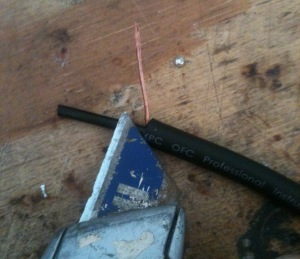
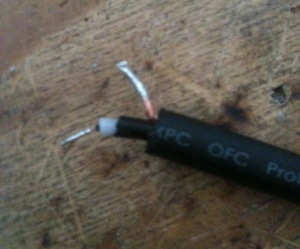
Step Eight: Repeat the previous step for the inner insulation. Again be careful not to cut too deep. A set of wire strippers is handy! Also twist the inner wire the same as you did for the outer braid.

Tin the wires.

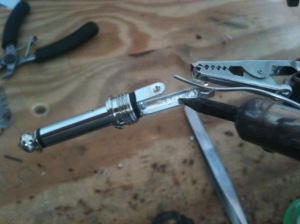
Step Nine: Tin the wires - basically apply the iron to the wires and feed in solder until they are thoroughly imprgnated with solder. This is essential. Michael uses a set of helping hands here, which makes things a lot easier to handle.

Tin the plug

Step Ten: You also must tin the plug. Apply heat and get some solder to pool up on the two contacts. Another essential step.

Cable Meets Plug for Long Romance

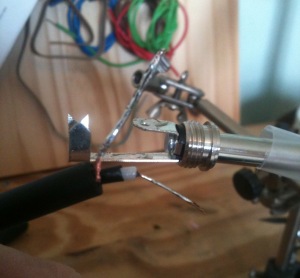
Step Eleven: Here we go positioning cable and plug together. They will be good freinds for a long time.

Cut the wires to length

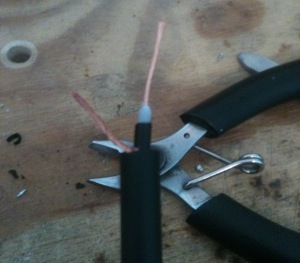
Step Twelve: After offering up the cable to the plug you will be abe to see what length you need to trim the wires to... use a pair of wire snips to trim them as in the picture above. Neat.

Soldering

Step Thirteen: Here's the cable soldered to the wire. Because you have tinned both elements they should come together easily. Use some flux on your bit to make sure everything flows together. When the work has cooled examine the solder joint and give it a good tug. It should be fab!

Sleeve and Case

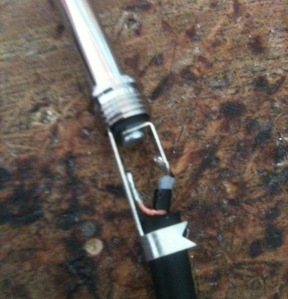
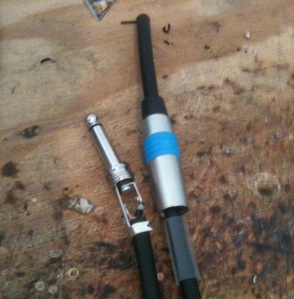
Step Fourteen: Pop the sleeve and case onto the other end of the cable - the top Neutric jacks allow you to pop the case on from the plug end, but these REAN (Neutrik) jacks need the case sliding on before you solder the other end! Easy to forget - honest!

Crimp and slide

Step Fifteen: Note the wire is crimped in place using a pair of pliers on the 'sleeve' terminal. Then the plastic insulating sleeve slides over the whole assembly. Don't mis this item out - it insulates the connections from the case. Some cheap jacks don't have this. How bad is that?

Now do the other end.

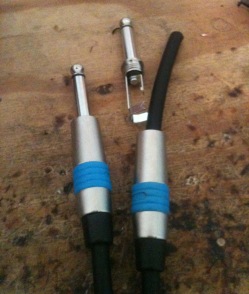
Step Sixteen: Now it comes to repeat for the other end. First though, pop the other case and sleeve onto the cable. Don't forget - it is really embarrasing!

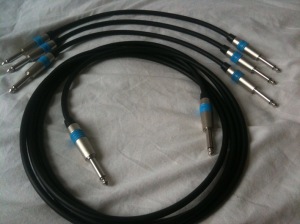
Gorgeous Finished Cables

Step Seventeen: So, heres the finished result. Best tested with a multimeter for connectivity and insulation...but plugging them in should be as good a test as anything. Fabulous Cables - much better perfomance than cheap shop items and a lot cheaper than some fancy name brands. Plus they have the Mojo that you made them. Thanks Michael for the pictures!

Posted in boutique effects, diystompboxes, Doctor Tweeks General Chat, Guest Writers, guitar effects | Tagged , , , , , , , , , , , | Leave a comment

Drilling Aluminium


I’ve had a few emails asking about the best way to drill aluminium. Bottom line and what works for me:

  • Quite a slow speed – about 800rpm (if you can do it) for the 12mm holes – bit faster for the small sizes.
  • A decent feed so that the bit cuts in and doesn’t just make the ally form a ‘skin’ which acts as a bush bearing, stopping progress.
  • Use Oil – or actually WD40 to lubricate the cutting edge. I’ve read about a combination of kerosene and bacon fat…. but let’s not go there! Oink.
  • Watch out for the ally clinging to the bit….it’s not actually melted, but smears over the cutting edge. Ally is very ductile…  Not good, but can be removed.
  • Use a center punch to get things started.
  • Work up in sizes – dont expect to drill 12mm straight off. Start small and work up in size (as the actress said to the bishop).
  • Remember that the bigger the hole, the slower the speed you need to use.
  • Get a stepper drill bit 🙂
  • Don’t panic.
Posted in diystompboxes | Leave a comment

Re-Housing a FX Pedal by Holger


Doctor Tweek is always on the lookout for interesting links and articles. Here’s a brilliant piece by one of the customers in the shop – Holger. He has a brand new blog site that looks as though it is going to be pretty interesting. Check it out.

Thinking about it I have a couple of old units that could use this treatment… I have a battered old Alesis Microverb kicking about somewhere in a cupboard…mmmm…. slot it into a fuzz face… 🙂

Meanwhile, I asked Holger if I could use his article: a bit of cut and paste 🙂  ….

My DIY pedal. Or: you can accept ugly if you fix it. by Holger

I play bass guitar. And I am a sound snob. I have used plenty of audio equipment, both digital and analog, over the years and I would think of myself being able to get the sound I want out of every box provided it can technically deliver what I need. So with my progress as a bass player over the last 2 years I progressed from a laptop based FX solution (Guitar Rig) to a digital stand alone multi FX (Zoom B9) and finally to a real analog pedal board with stomp boxes. I now have the sound I always wanted and while I appreciate the comfort of an all-in-one solution I’d rather find myself confined to the pedals I own knowing that they will always sound that much better.

I like to grab a bargain and if a cheap product can do the same as an expensive one I don’t mind going for a cheaper brand. But, and this is where we finally strike the chord of this blog, I hate ugly. For me its all about the user interface and the beauty of a well designed piece of technology. And while the discussion whether  you can achieve good product design for the same price as bad design may be reserved for another day, reality seems to teach us this very lesson.

I wanted a Phaser effect. So I went out and bought a Behringer Vintage Phaser VP1. It is a very accurate copy of the circuitry of an Electro Harmonix Small Stone. And it desperately wants to look like one, too. I would have forgiven this lack of inspiration if it would have had the built quality its design suggests unfortunately the great thing about this pedal is its sound when on. All else is really bad what you can expect for the price. After spending €19 Euro on it I decided to retain what’s great and spend a bit more to fix all of what’s not so great. Read below if you want to do the same to your VP1.

Issues to address:

  • The case sucks. I wanted a flat box design pedal.
  • The pot shaft is plastic, so is the knob. The really bad kind of plastic. lightweight and just cheap.
  • The tone switch is finicky and to easy to move.
  • The red LED is boring.
  • The foot switch is too easy going and once I opened the pedal I knew why. While it looks really pro its just a fake switch pressing down a tiny microswitch on a board.
  • The biggest issues: no true bypass and the thing is really prone to pick up all kinds of environment noise.

So I basically threw out all but the two main boards:

  • Case – gone, replaces by an aluminium case.
  • Pot replaced by a high quality 1M pot
  • Knob replaced by a big custom aluminium knob
  • LED replaced with a white one with a decent metal LED bezel
  • Switch replaced with a high quality DPDT switch
  • Footswitch replaced with high quality 3PDT foot switch
  • DC socket replaced with one you can build into a drilled hole.

I was just about to replace the audio sockets but decided to use the original ones as they were good enough.

Soldering took a couple of hours and since this was my first project of this kind I killed the following items during the process:

  • an LED
  • the first case as it was too small
  • A drill as I tried to widen holes with just the one metal drill I had. If you want to embark on this and you only  take one advise let it be this one: DO get a stepper drill.

Soldering wasn’t quite as easy as the original board is really crowded and the stuff is tiny. Re-connecting the pot, switch and LED turned out to be most challenging and you really want to use a desoldering tool, pliers and ideally a magnifier glass.

To implement the true bypass I used information found here. (mind the little corrections in the thread to connect audio socket).

I ordered all parts from DoctorTweek and I can not recommend this shop high enough. Steve is an absolute delight to deal with and you immediately get the feeling that you could talk to him for hours over a few pints.

Because it’s a Stone I decided to paint the case in grey primer and nothing else. It looks really stone-like and definitely sticks out of all the other pedals out there.

Now, looks like I need a Peter-Hook Chorus. Time to build a CloneClone.

Posted in boutique effects, diystompboxes, Guest Writers, guitar effects | Tagged , , , , , , , , | Leave a comment